Developer Blog

Tipps und Tricks für Entwickler und IT-Interessierte

Docker

Docker | Create an extensible build environment

Inhaltsverzeichnis

TL;DR

The complete code for the post is here.

General Information

Building a Docker image mainly means creating a Dockefile and specifying all the required components to install and configure.

So a Dockerfile contains at least many operating system commands for installing and configuring software and packages.

Keeping all commands in one file (Dockerfile) can lead to a confusing structure.

In this post I describe and explain an extensible structure for a Docker project so that you can reuse components for other components.

General Structure

The basic idea behind the structure is: split all installation instructions into separate installation scripts and call them individually in the dockerfile.

In the end the structure will look something like this (with some additional collaborators to be added and described later)

RUN bash /tmp/${SCRIPT_UBUNTU}
RUN bash /tmp/${SCRIPT_ADD_USER}
RUN bash /tmp/${SCRIPT_NODEJS}
RUN bash /tmp/${SCRIPT_JULIA}
RUN bash /tmp/${SCRIPT_ANACONDA}
RUN cat ${SCRIPT_ANACONDA_USER} | su user
RUN bash /tmp/${SCRIPT_CLEANUP}

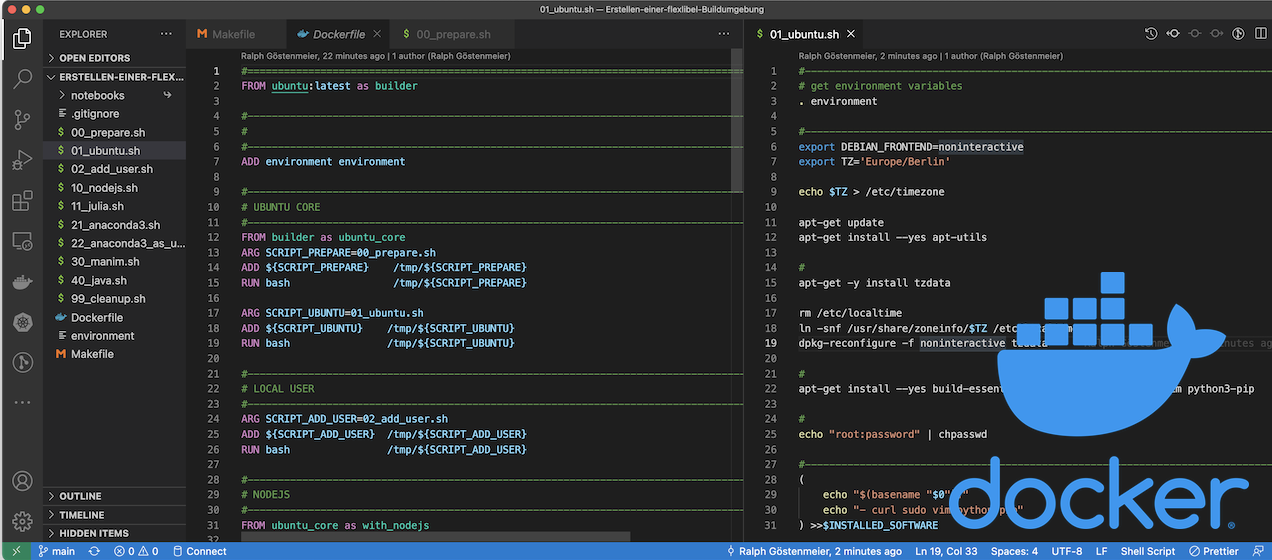
For example, preparing the Ubuntu image by installing basic commands is transfered into the script 01_ubuntu_sh

Hint: There are hardly any restrictions on the choice of names (variables and files/scripts). For the scripts, I use numbering to express order.

The script contains this code:

apt-get update                                       
apt-get install --yes apt-utils
apt-get install --yes build-essential lsb-release curl sudo vim python3-pip

echo "root:root" | chpasswd

Since we will be working with several scripts, an exchange of information is necessary. For example, one script installs a package and the other needs the installation folder.

We will therefore store information needed by multiple scripts in a separate file: the environment file environment

#--------------------------------------------------------------------------------------
USR_NAME=user
USR_HOME=/home/user

GRP_NAME=work

#--------------------------------------------------------------------------------------
ANACONDA=anaconda3
ANACONDA_HOME=/opt/$ANACONDA
ANACONDA_INSTALLER=/tmp/installer_${ANACONDA}.sh

JULIA=julia
JULIA_HOME=/opt/${JULIA}-1.7.2
JULIA_INSTALLER=/tmp/installer_${JULIA}.tgz

And each installation script must start with a preamble to use this environment file:

#--------------------------------------------------------------------------------------
# get environment variables
. environment

Preparing Dockerfile and Build Environment

When building an image, Docker needs all files and scripts to run inside the image. Since we created the installation scripts outside of the image, we need to copy them into the image (run run them). This also applies to the environment file environment.

File copying is done by the Docker ADD statement.

First we need our environment file in the image, so let’s copy this:

#======================================================================================
FROM ubuntu:latest as builder

#--------------------------------------------------------------------------------------
ADD environment environment

Each block to install one required software looks like this. To be flexible, we use variable for the script names.

ARG SCRIPT_UBUNTU=01_ubuntu.sh
ADD ${SCRIPT_UBUNTU}    /tmp/${SCRIPT_UBUNTU}
RUN bash tmp/${SCRIPT_UBUNTU}

Note: We can’t run the script directly because the run bit may not be set. So we will use bash to run the text file as a script.

As an add-on, we will be using Docker’s multi-stage builds. So here is the final code:

#--------------------------------------------------------------------------------------
# UBUNTU CORE
#--------------------------------------------------------------------------------------
FROM builder as ubuntu_core
ARG SCRIPT_UBUNTU=01_ubuntu.sh
ADD ${SCRIPT_UBUNTU}    /tmp/${SCRIPT_UBUNTU}
RUN bash 

Final results

Dockerfile

Here is the final Dockerfile:

#==========================================================================================
FROM ubuntu:latest as builder

#------------------------------------------------------------------------------------------
# 
#------------------------------------------------------------------------------------------
ADD environment environment
#------------------------------------------------------------------------------------------
# UBUNTU CORE
#------------------------------------------------------------------------------------------
FROM builder as ubuntu_core
ARG SCRIPT_UBUNTU=01_ubuntu.sh
ADD ${SCRIPT_UBUNTU}    /tmp/${SCRIPT_UBUNTU}
RUN bash                /tmp/${SCRIPT_UBUNTU}

#------------------------------------------------------------------------------------------
# LOCAL USER
#------------------------------------------------------------------------------------------
ARG SCRIPT_ADD_USER=02_add_user.sh
ADD ${SCRIPT_ADD_USER}  /tmp/${SCRIPT_ADD_USER}
RUN bash /tmp/${SCRIPT_ADD_USER}

#------------------------------------------------------------------------------------------
# NODEJS
#-----------------------------------------------------------------------------------------
FROM ubuntu_core as with_nodejs

ARG SCRIPT_NODEJS=10_nodejs.sh
ADD ${SCRIPT_NODEJS}    /tmp/${SCRIPT_NODEJS}
RUN bash                /tmp/${SCRIPT_NODEJS}

#--------------------------------------------------------------------------------------------------
# JULIA
#--------------------------------------------------------------------------------------------------
FROM with_nodejs as with_julia

ARG SCRIPT_JULIA=11_julia.sh
ADD ${SCRIPT_JULIA} /tmp/${SCRIPT_JULIA}
RUN bash /tmp/${SCRIPT_JULIA}

#---------------------------------------------------------------------------------------------
# ANACONDA3  with Julia Extensions
#---------------------------------------------------------------------------------------------
FROM with_julia as with_anaconda

ARG SCRIPT_ANACONDA=21_anaconda3.sh
ADD ${SCRIPT_ANACONDA} /tmp/${SCRIPT_ANACONDA}
RUN bash /tmp/${SCRIPT_ANACONDA}

#---------------------------------------------------------------------------------------------
#
#---------------------------------------------------------------------------------------------
FROM with_anaconda as with_anaconda_user
ARG SCRIPT_ANACONDA_USER=22_anaconda3_as_user.sh
ADD ${SCRIPT_ANACONDA_USER} /tmp/${SCRIPT_ANACONDA_USER}
#RUN cat ${SCRIPT_ANACONDA_USER} | su user

#---------------------------------------------------------------------------------------------
#
#---------------------------------------------------------------------------------------------
FROM with_anaconda_user as with_cleanup

ARG SCRIPT_CLEANUP=99_cleanup.sh
ADD ${SCRIPT_CLEANUP} /tmp/${SCRIPT_CLEANUP}
RUN bash /tmp/${SCRIPT_CLEANUP}

#=============================================================================================
USER    user
WORKDIR /home/user

#
CMD ["bash"]

Makefile

HERE := ${CURDIR}

CONTAINER := playground_docker

default:
	cat Makefile

build:
	docker build -t ${CONTAINER} .

clean:
	docker_rmi_all
	
run:
	docker run  -it --rm  -p 127.0.0.1:8888:8888 -v ${HERE}:/src:rw -v ${HERE}/notebooks:/notebooks:rw --name ${CONTAINER} ${CONTAINER}

notebook:
	docker run  -it --rm  -p 127.0.0.1:8888:8888 -v ${HERE}:/src:rw -v ${HERE}/notebooks:/notebooks:rw --name ${CONTAINER} ${CONTAINER} bash .local/bin/run_jupyter

Installation scripts

01_ubuntu.sh

#--------------------------------------------------------------------------------------------------
# get environment variables
. environment

#--------------------------------------------------------------------------------------------------
export DEBIAN_FRONTEND=noninteractive
export TZ='Europe/Berlin'

echo $TZ > /etc/timezone 

apt-get update                                       
apt-get install --yes apt-utils

#
apt-get -y install tzdata

rm /etc/localtime
ln -snf /usr/share/zoneinfo/$TZ /etc/localtime
dpkg-reconfigure -f noninteractive tzdata

#
apt-get install --yes build-essential lsb-release curl sudo vim python3-pip

#
echo "root:password" | chpasswd

Angular | Starting with Capacitor

Inhaltsverzeichnis

Introduction

Install Angular

$ npm -g install @angular/cli

Create sample app

❯ ng new app-capacitor
? Would you like to add Angular routing? Yes
? Which stylesheet format would you like to use? SCSS   [ https://sass-lang.com/documentation/syntax#scss]

❯ cd app-capacitor

Change output path to capacitor defaults

Change line in angular.json

      "architect": {
        "build": {
          "builder": "@angular-devkit/build-angular:browser",
          "options": {
            "outputPath": "dist",

 Add capacitor support

❯ ng add @capacitor/angular
ℹ Using package manager: npm
✖ Unable to find compatible package.  Using 'latest'.
✖ Package has unmet peer dependencies. Adding the package may not succeed.

The package @capacitor/angular will be installed and executed.
Would you like to proceed? Yes

Capacitor initialisieren

❯ npx cap init
[?] What is the name of your app?
    This should be a human-friendly app name, like what you'd see in the App Store.
√ Name ... app-capacitor
[?] What should be the Package ID for your app?
    Package IDs (aka Bundle ID in iOS and Application ID in Android) are unique identifiers for apps. They must be in
    reverse domain name notation, generally representing a domain name that you or your company owns.
√ Package ID ... com.example.app
√ Creating capacitor.config.ts in D:\CLOUD\Online-Seminare\Kurse\Angular\Einsteiger\App_Capacitor in 5.31ms
[success] capacitor.config.ts created!

Next steps:
https://capacitorjs.com/docs/v3/getting-started#where-to-go-next
[?] Join the Ionic Community! 💙
    Connect with millions of developers on the Ionic Forum and get access to live events, news updates, and more.
√ Create free Ionic account? ... no
[?] Would you like to help improve Capacitor by sharing anonymous usage data? 💖
    Read more about what is being collected and why here: https://capacitorjs.com/telemetry. You can change your mind at
    any time by using the npx cap telemetry command.
√ Share anonymous usage data? ... no

Build your app

We will need the dist directory with the web files

❯ ng build --prod
Option "--prod" is deprecated: No need to use this option as this builder defaults to configuration "production".
✔ Browser application bundle generation complete.
✔ Copying assets complete.
✔ Index html generation complete.

Initial Chunk Files               | Names         |      Size
main.b633c9096acdb457c421.js      | main          | 212.34 kB
polyfills.e4574352eda6eb439793.js | polyfills     |  35.95 kB
runtime.d66bb6fe709ae891f100.js   | runtime       |   1.01 kB
styles.31d6cfe0d16ae931b73c.css   | styles        |   0 bytes

                                  | Initial Total | 249.29 kB

Build at: 2021-05-28T09:32:28.905Z - Hash: ed2ed2d661b0d58b48f2 - Time: 28225ms
❯ npm install @capacitor/ios @capacitor/android
npm WARN @capacitor/angular@1.0.3 requires a peer of rxjs@~6.4.0 but none is installed. You must install peer dependencies yourself.
npm WARN @capacitor/angular@1.0.3 requires a peer of typescript@~3.4.3 but none is installed. You must install peer dependencies yourself.
npm WARN ajv-keywords@3.5.2 requires a peer of ajv@^6.9.1 but none is installed. You must install peer dependencies yourself.
npm WARN optional SKIPPING OPTIONAL DEPENDENCY: fsevents@2.3.2 (node_modules\fsevents):
npm WARN notsup SKIPPING OPTIONAL DEPENDENCY: Unsupported platform for fsevents@2.3.2: wanted {"os":"darwin","arch":"any"} (current: {"os":"win32","arch":"x64"})
npm WARN optional SKIPPING OPTIONAL DEPENDENCY: fsevents@1.2.13 (node_modules\webpack-dev-server\node_modules\fsevents):
npm WARN notsup SKIPPING OPTIONAL DEPENDENCY: Unsupported platform for fsevents@1.2.13: wanted {"os":"darwin","arch":"any"} (current: {"os":"win32","arch":"x64"})

+ @capacitor/ios@3.0.0
+ @capacitor/android@3.0.0
added 2 packages from 1 contributor, removed 1 package and audited 1375 packages in 7.385s

88 packages are looking for funding
  run `npm fund` for details

found 35 moderate severity vulnerabilities
  run `npm audit fix` to fix them, or `npm audit` for details

Add Platform Android

❯ npx cap add android
√ Adding native android project in android in 167.07ms
√ Syncing Gradle in 1.45ms
√ add in 169.83ms
[success] android platform added!
Follow the Developer Workflow guide to get building:
https://capacitorjs.com/docs/v3/basics/workflow
√ Copying web assets from dist to android\app\src\main\assets\public in 55.26ms
√ Creating capacitor.config.json in android\app\src\main\assets in 3.50ms
√ copy android in 164.93ms
√ Updating Android plugins in 7.76ms
√ update android in 75.79ms

Open Android Studio to build App

❯ npx cap open android
[info] Opening Android project at: android.

Learning | Hello World in different Languages

Python

print("Hello, World!")

Java

public class HelloWorld {
    public static void main(String[] args) {
        System out println("Hello, World!");
    }
}

C

#include <stdio h>

int main() {
    printf("Hello, World!\n");
    return 0;
}

C++:

#include <iostream>

int main() {
    std::cout << "Hello, World!" << std::endl;
    return 0;
}

JavaScript

console log("Hello, World!");

Ruby

puts "Hello, World!"

Swift

print("Hello, World!")

Go

package main

import "fmt"

func main() {
    fmt Println("Hello, World!")
}

Rust

fn main() {
    println!("Hello, World!");
}

PHP

<?php
echo "Hello, World!";
?>

Perl

print "Hello, World!\n";

Kotlin

fun main() {
    println("Hello, World!")
}

Scala

object HelloWorld {
  def main(args: Array[String]): Unit = {
    println("Hello, World!")
  }
}

Lua

print("Hello, World!")

Haskell

main :: IO ()
main = putStrLn "Hello, World!"

Dart

void main() {
  print('Hello, World!');
}

Shell

echo "Hello, World!"

Batch

@echo off
echo Hello, World!

PowerShell

Write-Output "Hello, World!"

VBScript

MsgBox "Hello, World!"

Objective-C

#import <Foundation/Foundation h>

int main(int argc, const char * argv[]) {
    @autoreleasepool {
        NSLog(@"Hello, World!");
    }
    return 0;
}

Assembly

section  data
    hello db 'Hello, World!',10
    len equ $ - hello

section  text
    global _start

_start:
    ; write our string to stdout
    mov eax, 4         ; sys_write
    mov ebx, 1         ; file descriptor 1 (stdout)
    mov ecx, hello     ; message to write
    mov edx, len       ; message length
    int 0x80           ; syscall
    ; exit
    mov eax, 1         ; sys_exit
    xor ebx, ebx       ; exit status 0
    int 0x80           ; syscall

VBA (Visual Basic for Applications)

Sub HelloWorld()
    MsgBox "Hello, World!"
End Sub

Tcl

puts "Hello, World!"

COBOL

       IDENTIFICATION DIVISION 
       PROGRAM-ID  HELLO-WORLD 
       PROCEDURE DIVISION 
           DISPLAY "Hello, World!" 
           STOP RUN 

26 F#:

printfn "Hello, World!"

Elixir

IO puts "Hello, World!"

SQL (MySQL)

SELECT 'Hello, World!';

SQL (SQLite)

SELECT 'Hello, World!';

SQL (PostgreSQL)

SELECT 'Hello, World!';

SQL (Oracle)

SELECT 'Hello, World!' FROM DUAL;

SQL (SQL Server)

PRINT 'Hello, World!';

Smalltalk

Transcript show: 'Hello, World!'; cr 

R

cat("Hello, World!\n")

Bash

echo "Hello, World!"

Erlang

-module(hello) 
-export([hello_world/0]) 

hello_world() ->
    io:fwrite("Hello, World!~n") 

Julia

println("Hello, World!")

MATLAB

disp('Hello, World!');

AutoHotkey

MsgBox, Hello, World!

Clojure

(println "Hello, World!")

Groovy

println "Hello, World!"

OCaml

print_endline "Hello, World!"

D

import std stdio;

void main()
{
    writeln("Hello, World!");
}

Crystal

puts "Hello, World!"

Nim

echo "Hello, World!"

Common Lisp

(format t "Hello, World!


Scheme

(display "Hello, World!")
(newline)

Prolog

:- initialization(main) 

main :-
    write('Hello, World!'), nl,
    halt 

ABAP

REPORT ZHELLO_WORLD 

WRITE: / 'Hello, World!' 

VB NET

vb net
Module HelloWorld
    Sub Main()
        Console WriteLine("Hello, World!")
    End Sub
End Module 

AI Environment | Writing Apps for OpenAI, ChatGPT, Ollama and others

Python UI Frameworks

  • Gradio
    Gradio is the fastest way to demo your machine learning model with a friendly web interface so that anyone can use it, anywhere!
  • Streamlit
    Streamlit turns data scripts into shareable web apps in minutes.
    All in pure Python. No front‑end experience required.
  • HyperDiv
    Open-source framework for rapidly building reactive web apps in Python, with built-in Shoelace components, Markdown, charts, tables, and more.
  • Shoelace
    A forward-thinking library of web components.

Ollama | Getting Started

Inhaltsverzeichnis

Installation

Read here for details.

Linuxcurl -fsSL https://ollama.com/install.sh | sh
Mac OSDownload
WindowsDownload

Start Ollama Service

ollama start

This starts the Ollama Service and binds it to the default ip address 127.0.0.1:11434

If you want to access the service from another host/client, you have to use the ip address 0.0.0.0

systemctl stop ollama.service
export OLLAMA_HOST=0.0.0.0:11434
ollama start

To change the IP address of the service, edit the file /etc/systemd/system/ollama.service and add

[Unit]
Description=Ollama Service
After=network-online.target

[Service]
ExecStart=/usr/local/bin/ollama serve
User=ollama
Group=ollama
Restart=always
RestartSec=3
Environment="OLLAMA_HOST=0.0.0.0:11434"

[Install]
WantedBy=default.target

Access the Ollama Service from your Browser using <ip-adress of host>:11434

Sample Python Chat

Install Python

Install Ollama Library

pip install ollama

Create the chat programm

#!/usr/bin/env python

from ollama import Client

ollama = Client(host='127.0.0.1')

response = ollama.chat(model='llama3', messages=[
  {
    'role': 'user',
    'content': 'Why is the sky blue?',
  },
])
print(response['message']['content'])

Run the programm

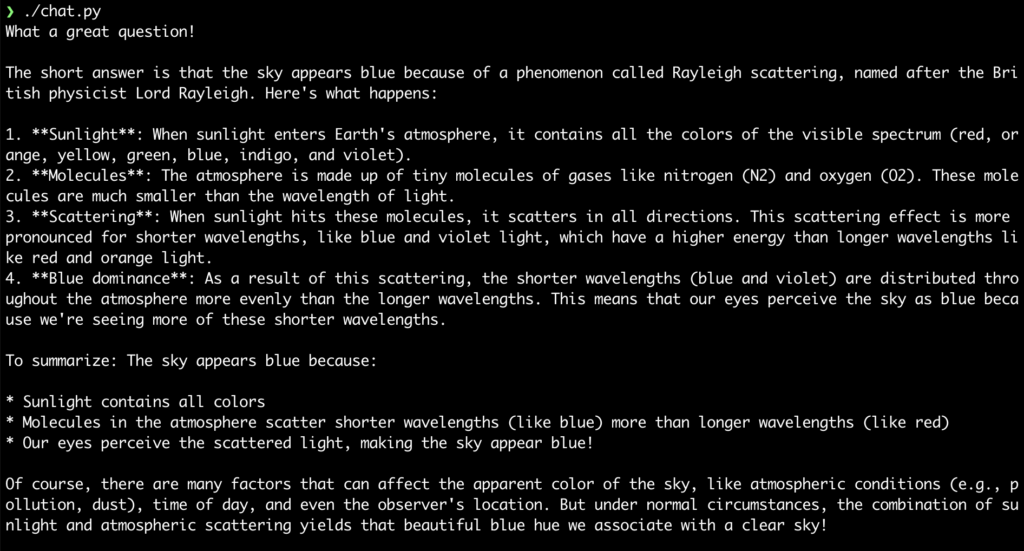
❯ ./chat.py

Hint: To see, whats happen with the service, monitor the logfile

❯ sudo journalctl -u ollama.service -f

Query the API

Read the API definition here

curl http://localhost:11434/api/generate -d '{
  "model": "llama2",
  "prompt": "Why is the sky blue?",
  "stream": false
}'

Create a simple ChatGPT Clone

Create the Gradio App

Gatsby | Getting started with Gatsby

Installation

npm init gatsby
pnpm create gatsby
❯ npm create gatsby
.../21.6.2/pnpm/store/v3/tmp/dlx-42253   |   +3 +
.../21.6.2/pnpm/store/v3/tmp/dlx-42253   | Progress: resolved 3, reused 1, downloaded 2, added 3, done
create-gatsby version 3.13.1

                                                                            Welcome to Gatsby!
What would you like to call your site?
✔ Getting-Started-with-Gatsby/ site
✔ Will you be using JavaScript or TypeScript?
· TypeScript
✔ Will you be using a CMS?
· No (or I'll add it later)
✔ Would you like to install a styling system?
· Tailwind CSS
✔ Would you like to install additional features with other plugins?
· Add responsive images
· Add an automatic sitemap
· Generate a manifest file
· Add Markdown and MDX support


Thanks! Here's what we'll now do:

    🛠  Create a new Gatsby site in the folder site
    🎨 Get you set up to use Tailwind CSS for styling your site
    🔌 Install gatsby-plugin-image, gatsby-plugin-sitemap, gatsby-plugin-manifest, gatsby-plugin-mdx

✔ Shall we do this? (Y/n) · Yes
✔ Created site from template
✔ Installed Gatsby
✔ Installed plugins
✔ Created site in site
🔌 Setting-up plugins...
info Adding gatsby-plugin-postcss
info Adding gatsby-plugin-image
info Adding gatsby-plugin-sitemap
info Adding gatsby-plugin-manifest
info Adding gatsby-plugin-mdx
info Adding gatsby-plugin-sharp
info Adding gatsby-transformer-sharp
info Adding gatsby-source-filesystem
info Installed gatsby-plugin-postcss in gatsby-config
success Adding gatsby-plugin-postcss to gatsby-config - 0.224s
info Installed gatsby-plugin-image in gatsby-config
success Adding gatsby-plugin-image to gatsby-config - 0.221s
info Installed gatsby-plugin-sitemap in gatsby-config
success Adding gatsby-plugin-sitemap to gatsby-config - 0.230s
info Installed gatsby-plugin-manifest in gatsby-config
success Adding gatsby-plugin-manifest to gatsby-config - 0.258s
info Installed gatsby-plugin-mdx in gatsby-config
success Adding gatsby-plugin-mdx to gatsby-config - 0.264s
info Installed gatsby-plugin-sharp in gatsby-config
success Adding gatsby-plugin-sharp to gatsby-config - 0.265s
info Installed gatsby-transformer-sharp in gatsby-config
success Adding gatsby-transformer-sharp to gatsby-config - 0.269s
info Installed gatsby-source-filesystem in gatsby-config
success Adding gatsby-source-filesystem (images) to gatsby-config - 0.279s
info Installed gatsby-source-filesystem in gatsby-config
success Adding gatsby-source-filesystem (pages) to gatsby-config - 0.286s
🎨 Adding necessary styling files...
🎉  Your new Gatsby site Getting Started with Gatsby has been successfully created
at /Users/Shared/CLOUD/Programmier-Workshops/Kurse/Gatsby/Einsteiger/Getting-Started-with-Gatsby/site.
Start by going to the directory with

  cd site

Start the local development server with

  npm run develop

See all commands at

  https://www.gatsbyjs.com/docs/reference/gatsby-cli/
❯ cd site
❯ npm install
❯ npm run develop

PHP | Ökosystem

Inhaltsverzeichnis

PHPStan

Finds bugs in your code without writing tests. It’s open-source and free.

PHPMD: PHP Mess Detector

What PHPMD does is: It takes a given PHP source code base and look for several potential problems within that source. These problems can be things like:

  • Possible bugs
  • Suboptimal code
  • Overcomplicated expressions
  • Unused parameters, methods, properties

PHPMD is a mature project and provides a diverse set of pre defined rules (though may be not as many its Java brother PMD) to detect code smells and possible errors within the analyzed source code. Checkout the rules section to learn more about all implemented rules.

PHP CodeSniffer

PHP_CodeSniffer tokenizes PHP files and detects violations of a defined set of coding standards.

GrumPHP

Sick and tired of defending code quality over and over again? GrumPHP will do it for you! This composer plugin will register some git hooks in your package repository. When somebody commits changes, GrumPHP will run some tests on the committed code. If the tests fail, you won’t be able to commit your changes. This handy tool will not only improve your codebase, it will also teach your co-workers to write better code following the best practices you’ve determined as a team.

https://api-platform.com

Laravel | Arbeiten mit Swagger

Schritt 1: Erstellen Sie ein Laravel-Projekt

Wenn Sie noch kein Laravel-Projekt haben, erstellen Sie eines mit Composer. Öffnen Sie Ihr Terminal und führen Sie den folgenden Befehl aus:

composer create-project --prefer-dist laravel/laravel App

Ersetzen Sie your-api-project durch den gewünschten Projektnamen.

Schritt 2: Installieren Sie die Swagger-PHP-Bibliothek

Sie benötigen die Swagger-PHP-Bibliothek, um Swagger-Dokumentation zu generieren. Installieren Sie diese mit Composer:

composer require zircote/swagger-php

Schritt 3: Erstellen Sie API-Routen

In Laravel definieren Sie Ihre API-Routen in der Datei routes/api.php. Sie können Routen erstellen, wie Sie es normalerweise für Ihre API tun würden.

routes/api.php

use Illuminate\Support\Facades\Route;

Route::get('/users', 'UserController@index');
Route::post('/users', 'UserController@store');
Route::get('/users/{id}', 'UserController@show');

Schritt 4: Generieren Sie Swagger-Annotationen

In Ihren Controller-Methoden verwenden Sie Swagger-Annotationen, um Ihre API zu dokumentieren. Hier ist ein Beispiel, wie man eine Controller-Methode annotiert:

/**
 * @SWG\Get(
 *     path="/users",
 *     summary="Holt eine Liste von Benutzern",
 *     tags={"Users"},
 *     @SWG\Response(response=200, description="Erfolgreiche Operation"),
 *     @SWG\Response(response=400, description="Ungültige Anfrage")
 * )
 */
public function index()
{
    // Ihre API-Logik hier
}

Weitere Informationen zu Swagger-Annotationen finden Sie in der Swagger-PHP-Dokumentation.

Schritt 5: Generieren Sie Swagger-Dokumentation

Nachdem Sie Ihre Controller annotiert haben, müssen Sie die Swagger-Dokumentation generieren. Dies können Sie mit dem artisan Befehl tun, der vom darkaonline/l5-swagger Paket bereitgestellt wird.

Zuerst installieren Sie das Paket:

composer require darkaonline/l5-swagger

Veröffentlichen Sie nun die Swagger-Konfiguration:

php artisan vendor:publish --provider "L5Swagger\L5SwaggerServiceProvider"

Bearbeiten Sie die Datei config/l5-swagger.php, um die Swagger-Konfiguration nach Bedarf anzupassen.

Schritt 6: Generieren Sie Swagger-Dokumentation

Führen Sie den folgenden Befehl aus, um die Swagger-Dokumentation zu generieren:

php artisan l5-swagger:generate

Die Swagger UI ist verfügbar unter http://127.0.0.1:8000/api/documentation.

Schritt 7: Zugriff auf Swagger UI

Öffnen sie die Swagger UI URL in Ihrem Browser.

Laravel | Erstellen eines API Backend

Inhaltsverzeichnis

TL;DR

Der Code für die in diesem Post erstelle Anwendung liegt hier.

Notwendige Komponenten eines API Backend

Für die Umsetzung eines API Backend benötigen wir in unserer Laravel App mehrere Komponenten:

  • ein Model, das beschreibt, wir die Daten aussehen, die unsere API verwendet
  • ein Controller, der den Programmcode beinhaltet, m die einzelnen Aktionen (Create, Read, Update, Delete, ..) auszuführen
  • weitere Komponenten, um die Nutzung zu erleichern
    • ein Seeder um die Datenbank mit definierte Werten zu füllen
    • ein Migrationsskript, um die notwendigen Datenbankeinträge (Tabelle, Spalten) zu erstellen
    • Testskripte, um unseren Controller und weitere Kompoentne zu prüfen

Hinweis

Vorab ein Hinweis: jeder der nachfolgenden Kommandos erstellen Komponenten in Form von Dateien. Ein erneutes Erstellen wird fehlschlagen, da die entsprechende Datei schon vorhanden ist.

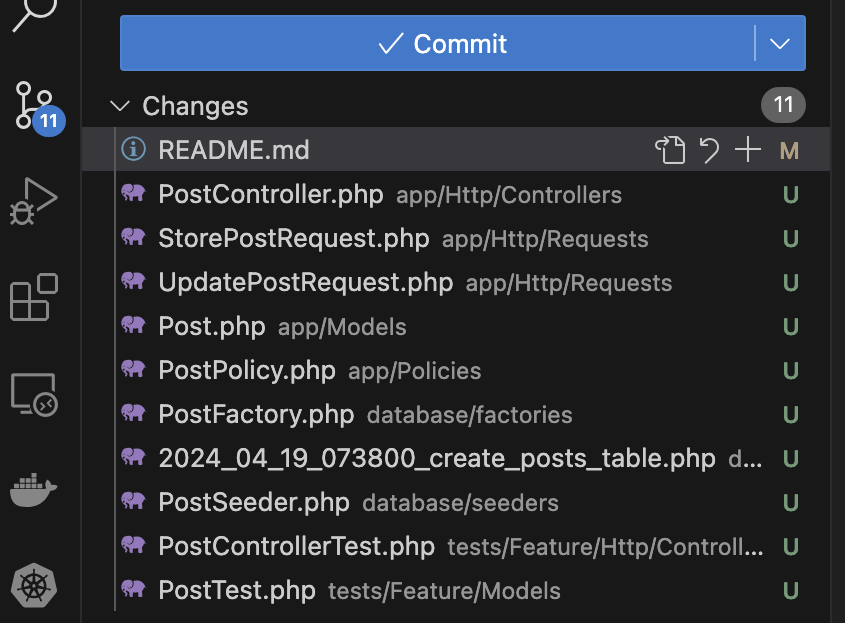
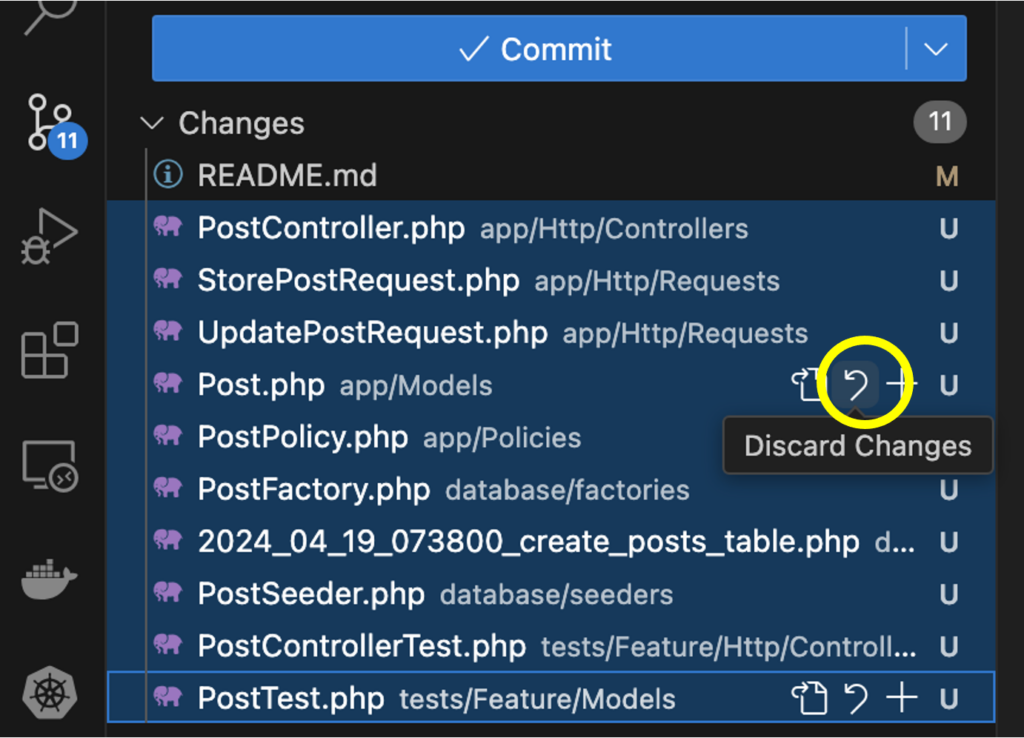
Um mit den verschiedenen Kommandos zu experimentieren, verwenden sie am besten eine Funktionalität von Git, die es ihnen ermöglicht de Status zurückzusetzen, also Dateien zu löschen.

Wenn Sie ein Kommando ausgeführt haben, dann sehen sie im Visual Studio die neu erstellen Dateien:

Selektieren sie die neu erstellten Dateien und wählen sie dann die Option Discard Changes:

Komponenten erstellen

Jede dieser Komponenten kann einzeln erstellt werden, z. B mit

❯ php artisan make:model Post
❯ php artisan make:controller PostController

Hierbei gilt es natürlich, die Abhängigkeiten zu berücksichtigen. Der Controller muss mit dem Model arbeiten und sollte daher die gleichen Felder und Feldnamen verwendet.

Einfacher ist es daher, das Laravel diese Abhängigkeiten kennt und entsprechend verwendet.

Bei der Erstellung des Models können wir auch einen dazu passenden Controller und weitere Komponenten erstellen:

❯ php artisan make:model Post --migration --controller --seed --api --requests --pest

   INFO  Model and test [app/Models/Post.php] created successfully.
   INFO  Migration [database/migrations/2024_04_19_073500_create_posts_table.php] created successfully.
   INFO  Seeder [database/seeders/PostSeeder.php] created successfully.
   INFO  Request [app/Http/Requests/StorePostRequest.php] created successfully.
   INFO  Request [app/Http/Requests/UpdatePostRequest.php] created successfully.
   INFO  Controller and test [app/Http/Controllers/PostController.php] created successfully.

Dies erstellt die Dateien

	app/Http/Controllers/PostController.php
	app/Http/Requests/
	app/Models/Post.php
	database/migrations/2024_04_19_073500_create_posts_table.php
	database/seeders/PostSeeder.php
	tests/Feature/Http/
	tests/Feature/Models/

Und um alle möglichen Komponenten zu erstellen, verwenden wir den nachfolgenden Befehl:

❯ php artisan make:model Post --all --pest

   INFO  Model and test [app/Models/Post.php] created successfully.
   INFO  Factory [database/factories/PostFactory.php] created successfully.
   INFO  Migration [database/migrations/2024_04_19_073800_create_posts_table.php] created successfully.
   INFO  Seeder [database/seeders/PostSeeder.php] created successfully.
   INFO  Request [app/Http/Requests/StorePostRequest.php] created successfully.
   INFO  Request [app/Http/Requests/UpdatePostRequest.php] created successfully.
   INFO  Controller and test [app/Http/Controllers/PostController.php] created successfully.
   INFO  Policy [app/Policies/PostPolicy.php] created successfully.

Dies erstellt die Dateien

	app/Http/Controllers/PostController.php
	app/Http/Requests/
	app/Models/Post.php
	app/Policies/PostPolicy.php
	database/factories/PostFactory.php
	database/migrations/2024_04_19_075242_create_posts_table.php
	database/seeders/PostSeeder.php
	tests/Feature/Http/
	tests/Feature/Models/

Jetzt aber genug der Einführung. Lassen Sie uns mit dem Erstellen des API Backend beginnen.

Sollten Sie Komponentne erstellen haben, dann löschen Sie diese wie beschrieben.

Einrichten der Starter-App

Erstellen der Starter App. In diesem Post beschreibe ich, wie sie eine Starter-App erstellen und die grundlegenden Anpassungen durchführen können.

Sie können die Starter App auch mit dem Laravel-Installer erstellen:

❯ laravel new App   --jet 
                   --api 
                   --database sqlite 
                   --stack livewire  
                   --teams 
                   --dark 
                   --verification 
                   --git 
                   --pest

Oder auch direkt mit dem dazugehörigen Repository starten:

❯ git clone https://github.com/r14r/Laravel_Tutorial_Erstellen-einer-Starter-App App
❯ cd App
❯ composer install
❯ npm install
❯ npm run build
❯ cp .env.example  .env
❯ php artisan migrate
❯ php artisan key:generate
❯ php artisan serve

Erstellen der erforderlichen Komponenten

❯ php artisan make:model Post --all --pest

   INFO  Model and test [app/Models/Post.php] created successfully.
   INFO  Factory [database/factories/PostFactory.php] created successfully.
   INFO  Migration [database/migrations/2024_04_19_075600_create_posts_table.php] created successfully.
   INFO  Seeder [database/seeders/PostSeeder.php] created successfully.
   INFO  Request [app/Http/Requests/StorePostRequest.php] created successfully.
   INFO  Request [app/Http/Requests/UpdatePostRequest.php] created successfully.
   INFO  Controller and test [app/Http/Controllers/PostController.php] created successfully.
   INFO  Policy [app/Policies/PostPolicy.php] created successfully.

Anpassen des Routing

Erweiteren Sie die Datei routes/api.php um den nachfolgenden Programmcode (Zeile 6 und 12-14):

<?php

use Illuminate\Http\Request;
use Illuminate\Support\Facades\Route;

use App\Http\Controllers\PostController;

Route::get('/user', function (Request $request) {
    return $request->user();
})->middleware('auth:sanctum');

Route::get('/post',         [PostController::class, 'index']);
Route::post('/post',        [PostController::class, 'store']);
Route::delete('/post/{id}', [PostController::class, 'destroy']);

Prüfen wir die von Laravel erkannten Routen:

Erster Test

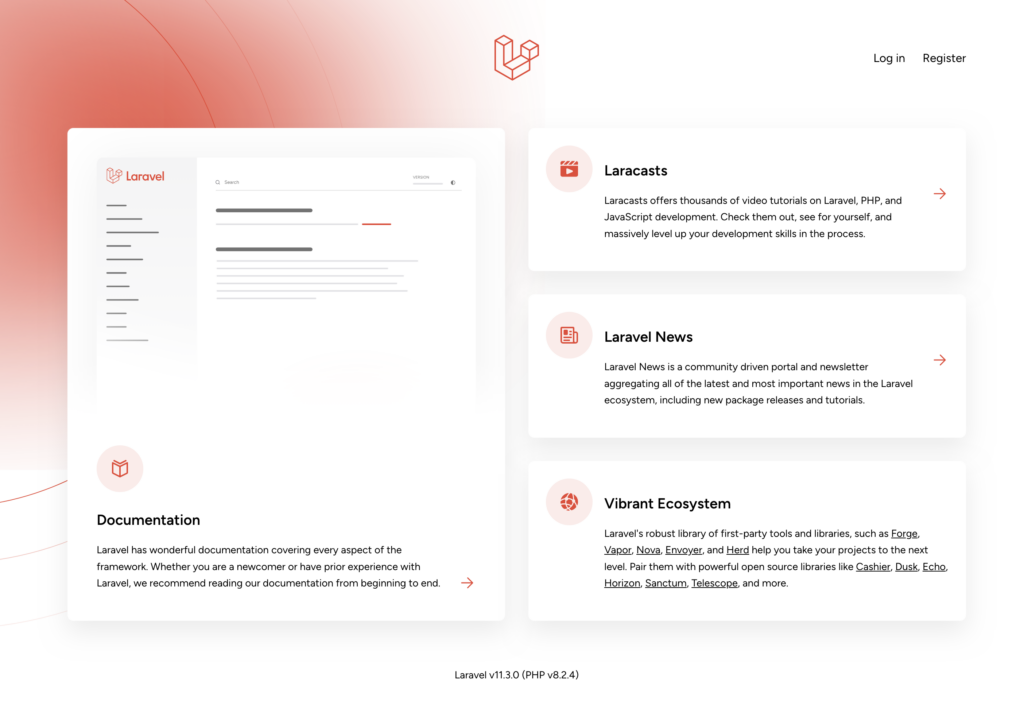
Prüfen wir die bisherigen Schritte. Starten sie Laravel und öffnen sie einen Browser unter der Adresse http://127.0.0.1:8000/api/post

❯ php artisan serve

   INFO  Server running on [http://127.0.0.1:8000].

  Press Ctrl+C to stop the server

Sie sehen, das sie nichts sehen. Was zu erwarten war, da die API noch keine Daten hat und daher auch keine Daten liefern kann.

Datenbank

Tabelle erstellen

Erweitern wir als nächstes das Migrations-Skript, um die notwendige Tabelle zu erstellen und mit Werten zu füllen.

Die entsprechende Datei ist

database/migrations/2024_04_19_075600_create_posts_table.php 

Der genaue Name kann dabei bei Ihnen abweichen.

Passen sie die Funktion up() an:

public function up(): void
{
    Schema::create('posts', function (Blueprint $table) {
        $table->id();
        $table->string('title');
        $table->text('content');
        $table->timestamps();
    });
}

Die neuen Felder werden über eine Migration in der Datenbank erstellt:

❯ php artisan migrate

Wir kontrollieren, ob die Tabelle richtig erstellt wurde:

❯ php artisan db
SQLite version 3.37.0 2021-12-09 01:34:53
Enter ".help" for usage hints.
sqlite> PRAGMA table_info(posts);
0|id|INTEGER|1||1
1|title|varchar|1||0
2|content|TEXT|1||0
3|created_at|datetime|0||0
4|updated_at|datetime|0||0
sqlite> .quit

Tabelle füllen mit Hilfe eines Seeder

Erstellen Sie den Seeder, falls die Datei database/seeders/PostSeeder.php nicht vorhanden ist:

php artisan make:seeder PostSeeder

Ersetzen Sie den Inhalt mit dem nachfolgenden Programmcode:

<?php

namespace Database\Seeders;

use Illuminate\Support\Facades\DB;

use Illuminate\Database\Console\Seeds\WithoutModelEvents;
use Illuminate\Database\Seeder;

class PostSeeder extends Seeder
{
    static $posts = [
        ['title' => 'Summer Health', 'content' => 'Stay hydrated!'],
        ['title' => 'Pasta Recipe',  'content' => 'Tomato base'],
        ['title' => 'Decor Ideas',   'content' => 'Go minimal'],
        ['title' => 'Python Tips',   'content' => 'Use lists']
    ];

    public function run(): void
    {
        foreach (self::$posts as $post) {
            DB::table('posts')->insert([
                'title' => $post['title'], 'content' => $post['content']
            ]);
        }
    }
}

Starten Sie den Seeder:

❯ php artisan db:seed --class PostSeeder

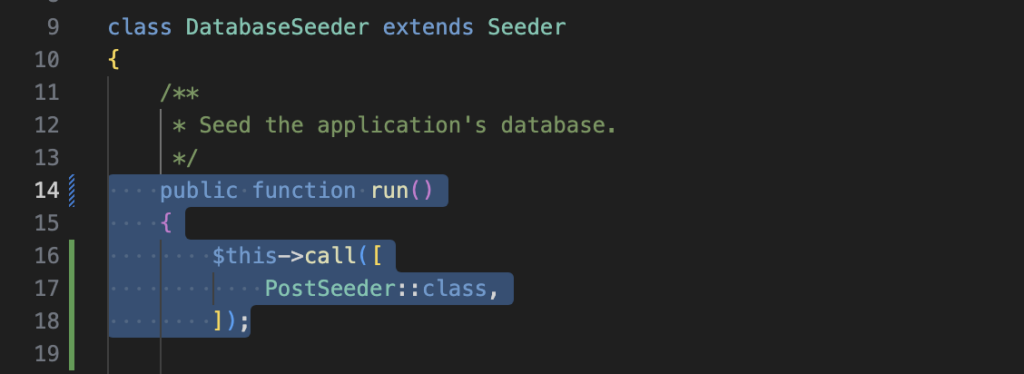
Hinweis: Sie können diesen Seeder auch die den generellen DatabaseSeeder mit aufnehmen, so das der Name des Seeders nicht mit angegeben werden muss.

Fügen die in der Datei database/seeders/DatabaseSeeder.php den nachfolgenden Programmcode hinzu:

$this->call([
    PostSeeder::class,
]);

Starten Sie den Seeder:

❯ php artisan db:seed

Bearbeiten der Komponenten

Model

Erweitern Sie die Datei app/Models/Post.php um die zusätzlichen Felder:

protected $fillable = ['title', 'content', 'created_at', 'updated_at'];

Testing

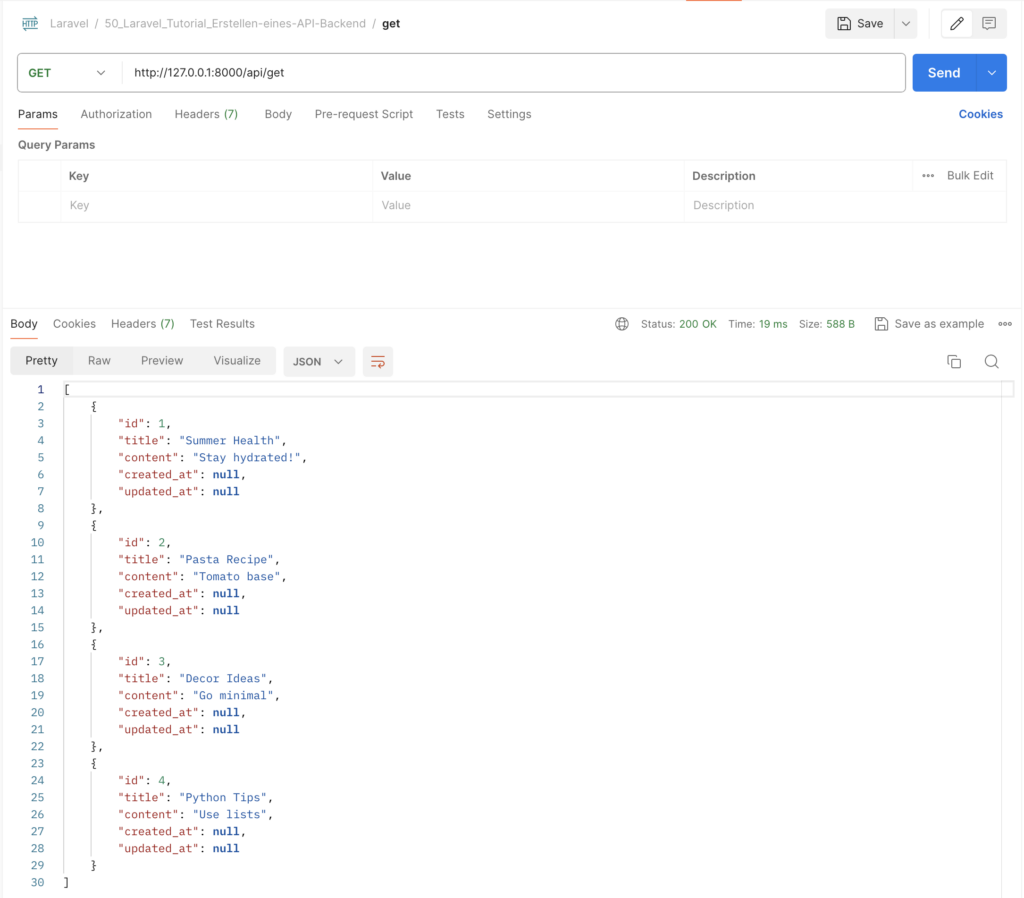
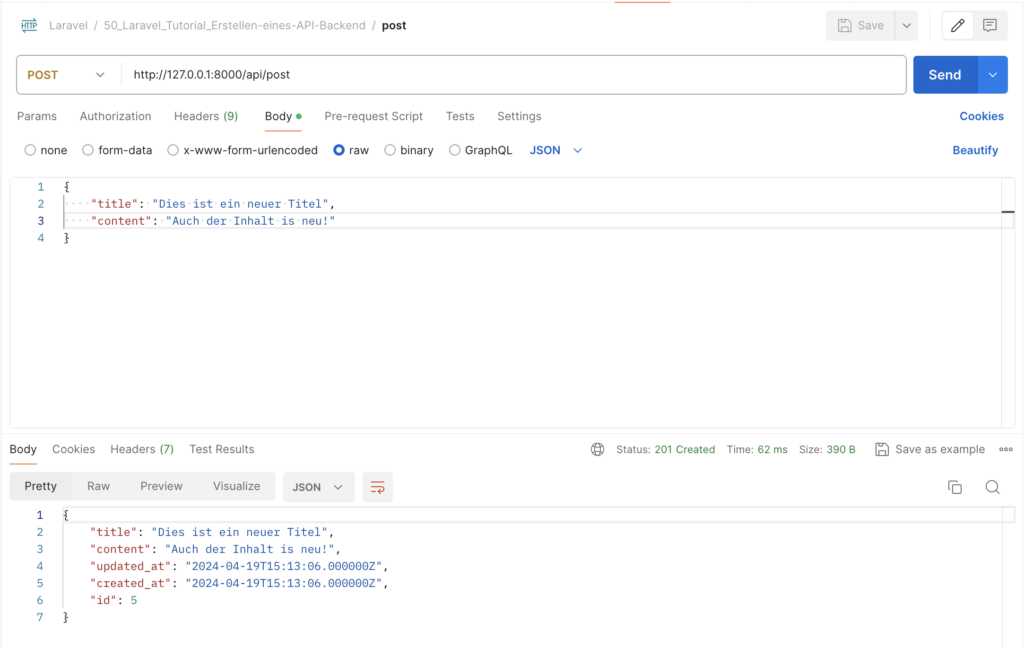
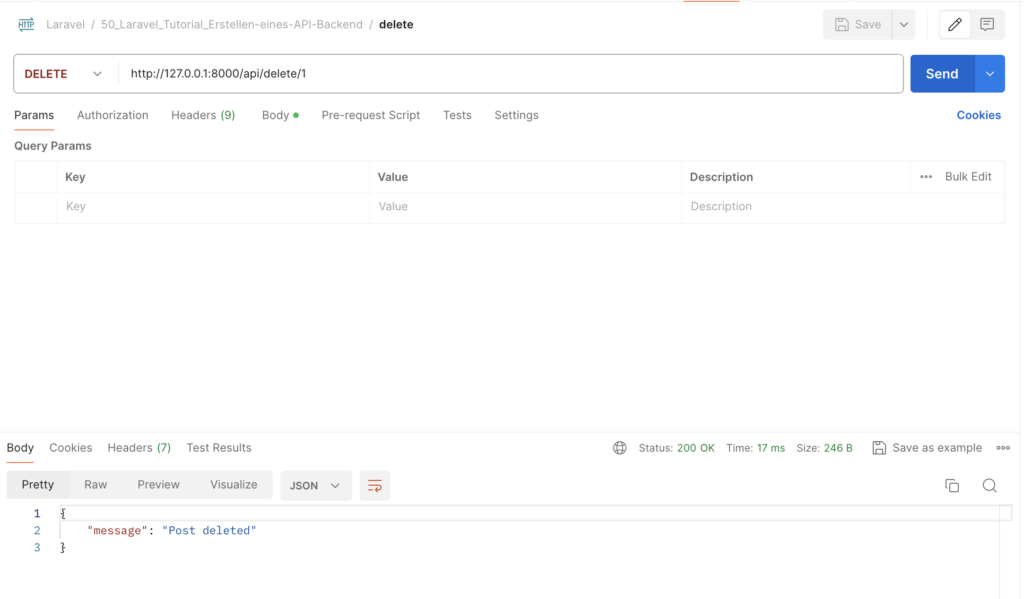
Für die Operationen GET (Einträge anzeigen), POST (neuen Eintrag erstellen) und DELETE (Eintrag löschen) stehen jeweils eigene URLs zur Verfügung. Am einfachsten ist der Test der URLs mit Postman.

Testen mit Postman

GET

http://127.0.0.1:8000/api/get

POST

http://127.0.0.1:8000/api/post

DELETE

http://127.0.0.1:8000/api/delete/6        

Testen mit curl in der Kommandozeile

GET

❯ curl http://127.0.0.1:8000/api/post
[{"id":1,"title":"Summer Health","content":"Stay hydrated!","created_at":null,"updated_at":null},{"id":2,"title":"Pasta Recipe","content":"Tomato base","created_at":null,"updated_at":null},{"id":3,"title":"Decor Ideas","content":"Go minimal","created_at":null,"updated_at":null},{"id":4,"title":"Python Tips","content":"Use lists","created_at":null,"updated_at":null}]

POST

❯ curl -X POST  http://127.0.0.1:8000/api/post -H "Content-Type: application/json" -d '{ "title": "Neuer Titel", "content": "Neuer Inhalt!" }'
{"title":"Neuer Titel","content":"Neuer Inhalt!","updated_at":"2024-04-19T15:48:22.000000Z","created_at":"2024-04-19T15:48:22.000000Z","id":6}

DELETE

❯ curl -X DELETE http://127.0.0.1:8000/api/post/6
{"message":"Post deleted"}        

Laravel | Erstellen eines Blade Layouts

Inhaltsverzeichnis

TL;DR

Der Code für die in diesem Post erstelle Anwendung liegt hier.

Einrichten der Starter-App

Erstellen der Starter App. In diesem Post beschreibe ich, wie sie eine Starter-App erstellen und die grundlegenden Anpassungen durchführen können.

Sie können auch direkt mit dem dazugehörigen Repository starten:

❯ git clone https://github.com/r14r/Laravel_Tutorial_Erstellen-einer-Starter-App App
❯ cd App
❯ composer install
❯ npm install
❯ npm run build
❯ cp .env.example  .env
❯ php artisan migrate
❯ php artisan key:generate
❯ php artisan serve

Motivation

Betrachten wir die Dashboard-Seite der Starter-App: dashboard.blade.php. Es fällt auf, das nur der eigentliche Inhalt definiert wird (z. B. der Willkommens-Text in Zeile 11). Das eigentliche “Aussehen” (Layout) wird abgeleitet von dem generellen App-Layout. Dies wird durch die folgende erste Zele erreicht:

<x-app-layout>

Wir wollen Seiten entwicklen, die ein unterschiedliches Aussehen haben. Daher wollen wir neben dem generellen App-Layout noch weitere Layouts erstellen.

Ein weiteres Layout soll z. B. eine Seitenleiste erhalten, wir wollen es AppSidebarLayout nennen.

Verwendet wird es dann, wenn als erste Zeile die folgende verwendet wird:

<x-app-sidebar-layout>

Neue Seite erstellen

Im ersten Schritt erstellen wir zuerst eine neue Seite

Blade-Datei für neue Seite erstellen

Kopieren sie die Datei dashboard.blade.php nach page_with_sidebar.blade.php.

Löschen sie den Aufruf des Willkommens-Text in Zeile 11:

<x-app-layout>
    <x-slot name="header">
        <h2 class="font-semibold text-xl text-gray-800 dark:text-gray-200 leading-tight">
            {{ __('Dashboard') }}
        </h2>
    </x-slot>

    <div class="py-12">
        <div class="max-w-7xl mx-auto sm:px-6 lg:px-8">
            <div class="bg-white dark:bg-gray-800 overflow-hidden shadow-xl sm:rounded-lg">
            </div>
        </div>
    </div>
</x-app-layout>

Navigationsleiste erweitern

Erstellen Sie einen weiteren Navigationslink in der Datei resources/views/navigation-menu.blade.php:

<x-nav-link href="{{ route('page_with_sidebar') }}" :active="request()->routeIs('page_with_sidebar')">
    {{ __('Page with Sidebar') }}
</x-nav-link>

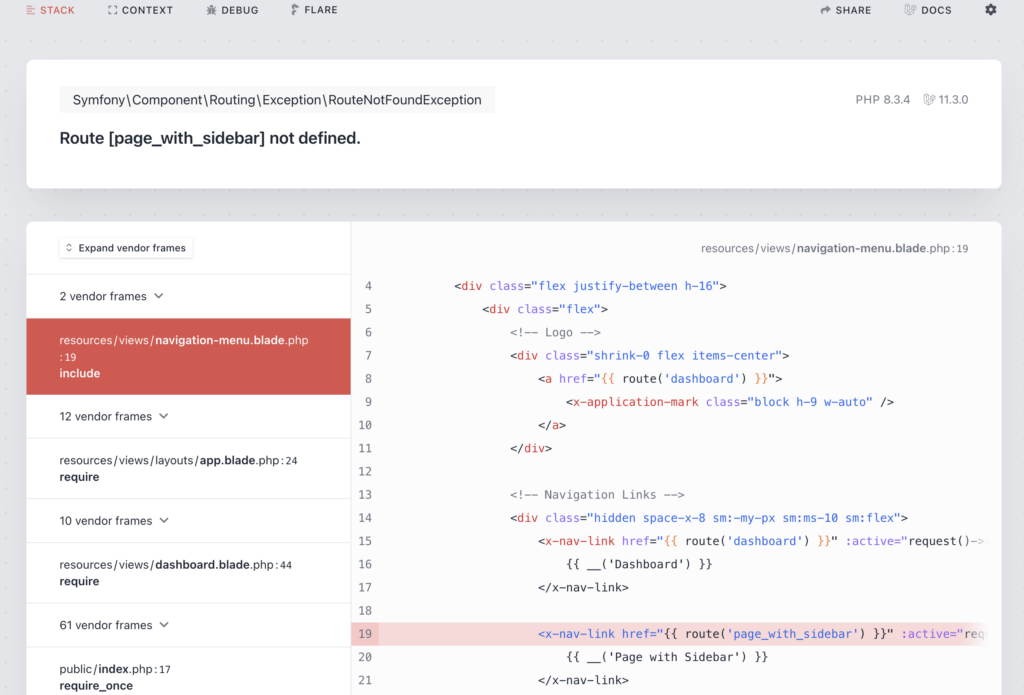
Wenn Sie jetzt die Seite aufrufen, dann bekommen Sie einen Fehler: die Route wurde nicht gefunden

Routing hinzufügen

Erweitern Sie die Datei routes/web.php und die neue Route:

 Route::get('/page_with_sidebar', function () {
        return view('page_with_sidebar');
 })->name('page_with_sidebar');

Ergebnis

So sieht dann unsere Seite aus:

Neues Layout verwenden

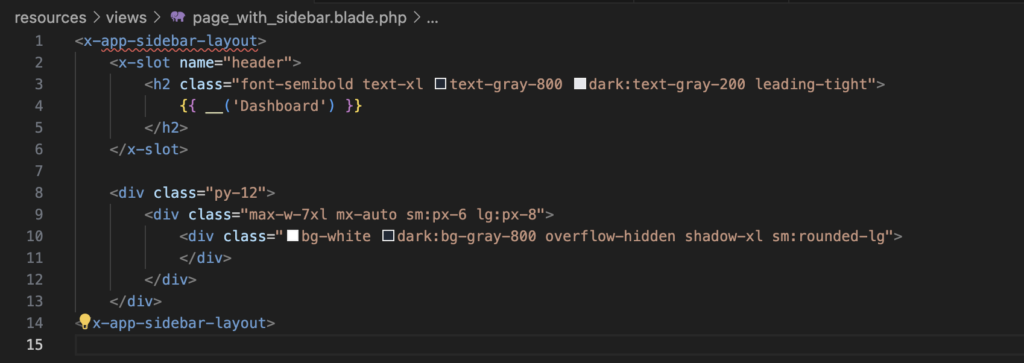
Nun ändern wir das Layout unserer neuen Seite in Zeile 1 und Zeile 14

<x-app-sidebar-layout>

Wenn Sie jetzt alles speichern und die Seite aktualisieren (im Browser) bekommen sie wie zu Erwarten eine Fehlermeldung:

Lassen Sie uns also das neue Layout erstellen.

Neues Layout erstellen

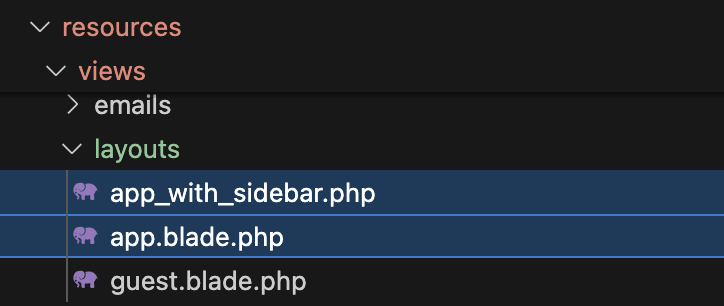
Kopieren der Datei resources/views/layouts/app.blade.php nach resources/views/layouts/app_with_sidebar.php.