- Part 1: Create a TDD Python Project
- Part 2: Use Jenkins to automatically test your App
Part 1: Create a TDD Python Project
Final source code is on Github.
Introduction
The task of creating an error free program is not easy. And, if your program runs free of errors, keeping it error-free after an update or change is even more complicated. You don’t want to insert new errors or change correct code with wrong parts.
The answer to this situation (directly from the Oracle of Delphi) is: Testing, Testing, Testing
And the best way to test is to start with tests.
This means: think about what the result should be and then create a Test that checks this. Imagine, you have to write a function for adding two values, and you should describe the functionality.
So, maybe, your description contains one or two examples:
My functions add’s two numbers, e.g 5 plus 7 is 12 (or at least should be 12 :))
The procedure with the TDD is:
- think and define, what the function should to
- write a stub for the function, e.g. only function parameters and return type
- write a function, that tests you function with defines parameters and know result
For our example above, this means:
Write the python script with the desired functionality: src/main.py
def add(val1,val2):
    return 0 # this is only a dummy return value
Write the Python Testscript: tst/main.p
def_test_add():
    result = add(5,7)

    if (result = 12):
        print("everything fine")
    else:
        printf("ups, problems with base arithmetics")
Now, with these in your toolbox, you can always verify your code by running the tests.
$ python test_add.py
ups, problems with base arithmetics
Setup virtual environment
Mostly, tests are repeated after every change. So, to be sure, that each test is running the same way and with the same environment, we will use pythons virtual environment feature to create a new fresh python environment for the tests.
Create virtual environment
$ python3 -m venv .env/python
Activate environment
Add the following line to .bashrc (or .envrc if you are using direnv)
$ . .env/python/bin/activate
Install required packages
$ pip install pytest
Create a sample Application
Prepare folder
Create folder for sources
$ mkdir src
Create sample package
$ mkdir src/CalculatorLib
$ touch src/CalculatorLib/__init__.py
$ touch src/CalculatorLib/Calculator.py
At least, create a simple Calculator: src/CalculatorLib/Calculator.py
class Calculator:
    def __init__(self):
        print("Init Calculator")

    def add(self, a, b):
        return a + b

    def subtract(self, a, b):
        return a - b

    def multiply(self, a, b):
        return a * b

    def divide(self, a, b):
        return a / b

    def power(self, base, exp):
        return base ** exp
Create the Main App for your Calculator: src/main.py
from CalculatorLib.Calculator import Calculator

class Main(object):

    def run(self):
        c = Calculator()

        print("5 + 3 =
        print("8 - 4 =
        print("5 * 3 =
        print("8 / 4 =

        print("8 ^ 4 =

if __name__ == '__main__':
    Main().run()
Yur done with the fist development step. Try your app:
$ python src/main.py
Init Calculator
5 + 3 =     8
8 - 4 =     4
5 * 3 =    15
8 / 4 =     2
8 ^ 4 =  4096
Add Unit Tests
We will start with our first test. Create folder for tests and a file tst/main.py
$ mkdir tst
$ touch tst/main.py
Use the following for your test script tst/main.py
from CalculatorLib.Calculator import Calculator
import unittest

class CalculatorTest(unittest.TestCase):

    @classmethod
    def setUpClass(self):
        self.c = Calculator()

    def test_add(self):
        self.assertEqual(8, self.c.add(5, 3))

    def test_subtract(self):
        self.assertEqual(4, self.c.subtract(8, 4))

    def test_multiply(self):
        self.assertEqual(32, self.c.multiply(8, 4))

    def test_divide(self):
        self.assertEqual(2, self.c.divide(8, 4))

    def test_power(self):
        self.assertEqual(16, self.c.power(2, 4))

if __name__ == '__main__':
    unittest.main()
Finally try your test script:
$ PYTHONPATH=./src python -m pytest tst/main.py  --verbose
================================= test session starts ================================
platform darwin -- Python 3.7.4, pytest-4.4.1, py-1.8.0, pluggy-0.9.0 -- <Testproject_Python-Calculator/.env/python/bin/python>
cachedir: .pytest_cache
rootdir: <Testproject_Python-Calculator>
plugins: cov-2.6.1
collected 5 items

tst/main.py::CalculatorTest::test_add PASSED             [ 20%]
tst/main.py::CalculatorTest::test_divide PASSED          [ 40%]
tst/main.py::CalculatorTest::test_multiply PASSED        [ 60%]
tst/main.py::CalculatorTest::test_power PASSED           [ 80%]
tst/main.py::CalculatorTest::test_subtract PASSED        [100%]
The command to run the test is python -m pytest tst/main.py, but why the lead Variable PYTHONPATH?
Try it without:
$ python -m pytest tst/main.py
=================================== test session starts ==================================
platform darwin -- Python 3.7.4, pytest-4.4.1, py-1.8.0, pluggy-0.9.0 -- ##/Testproject_Python-Calculator/.env/python/bin/python
cachedir: .pytest_cache
rootdir: ##/Testproject_Python-Calculator
plugins: cov-2.6.1
collected 0 items / 1 errors

========================================= ERRORS =========================================
____________________________________ ERROR collecting tst/main.py ________________________
ImportError while importing test module '##/Testproject_Python-Calculator/tst/main.py'.
Hint: make sure your test modules/packages have valid Python names.
Traceback:
tst/main.py:2: in <module>
    from CalculatorLib.Calculator import Calculator
E   ModuleNotFoundError: No module named 'CalculatorLib'
!!!!!!!!!!!!!!!!!!!!!!!!! Interrupted: 1 errors during collection !!!!!!!!!!!!!!!!!!!!!!!!
================================== 1 error in 1.84 secon==================================
Recognize the ModuleNotFoundError in line 16! This means, that Python could not find the desired CalculatorLib.
Look at your folder structure:
$ tree .
.
├── src
│   ├── CalculatorLib
│   │   ├── Calculator.py
│   │   ├── init__.py
│   └── main.py
└── tst
└── main.pyIn your Testscript, we import the CalculatorLib whit this statement:
from CalculatorLib.Calculator import Calculator
Python is interpreting this in the following way:
- Look in the folder of the test script for a subfolder with the name CalculatorLib
- There, look for a file
Calculator.py - And in this file, use the class Calculator
Obviously, the folder CalculatorLib is NOT in the same folder as the test script: it is part of the src folder.
So, using the environment variable PYTHONPATH, we inform python where to search python scripts and folders.
Add additional functionality
Add a function at the end of your Calculator: src/CalculatorLib/Calculator.py
    ....
    def factorial(self, n):
        return 0
Add a call of the new function to your main app: src/main.py
...
def run(self):
...
print("4! =
Add a test for the new function to your test script: tst/main.py
...
def test_factorial(self):
self.assertEqual(24, self.c.factorial(4))Try it:
$ python src/main.py
Init Calculator
5 + 3 = 8
8 - 4 = 4
5 * 3 = 15
8 / 4 = 2
8 ^ 4 = 4096
$ PYTHONPATH=./src python -m pytest tst/main.py
==================================== test session starts =====================================
platform darwin -- Python 3.7.4, pytest-4.4.1, py-1.8.0, pluggy-0.9.0
rootdir: ##/Testproject_Python-Calculator
plugins: cov-2.6.1
collected 6 items
tst/main.py ..F... [100%]
========================================== FAILURES ==========================================
_______________________________ CalculatorTest.test_factorial ________________________________
self = <main.CalculatorTest testMethod=test_factorial>
def test_factorial(self):
> self.assertEqual(24, self.c.factorial(4))
E AssertionError: 24 != 0
tst/main.py:31: AssertionError
============================= 1 failed, 5 passed in 0.14 seconds =============================Test failed, was we expect it.
Now, implement the function correctly and startover the test:
Add a function at the end of your Calculator: src/CalculatorLib/Calculator.py
import math
class Calculator:
...
def factorial(self, n):
if not n >= 0:
raise ValueError("n must be >= 0")
if math.floor(n) != n:
raise ValueError("n must be exact integer")
if n+1 == n: # catch a value like 1e300
raise OverflowError("n too large")
result, factor = 1, 2
while factor <= n:
result *= factor
factor += 1
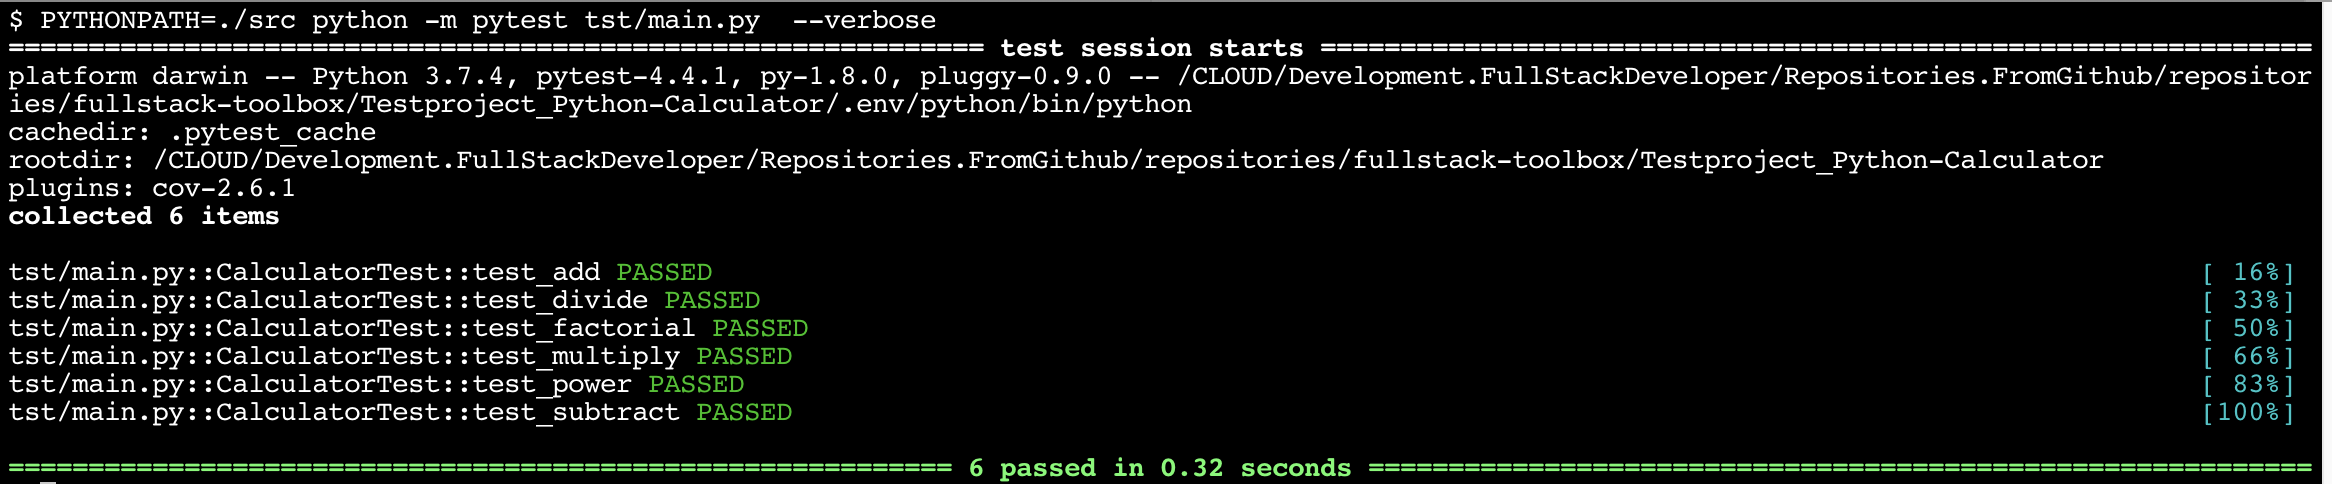
return result$ PYTHONPATH=./src python -m pytest tst/main.py --verbose
==================================== test session starts =====================================
platform darwin -- Python 3.7.4, pytest-4.4.1, py-1.8.0, pluggy-0.9.0 -- ##/Testproject_Python-Calculator/.env/python/bin/python
cachedir: .pytest_cache
rootdir: ##/Testproject_Python-Calculator
plugins: cov-2.6.1
collected 6 items
tst/main.py::CalculatorTest::test_add PASSED [ 16%]
tst/main.py::CalculatorTest::test_divide PASSED [ 33%]
tst/main.py::CalculatorTest::test_factorial PASSED [ 50%]
tst/main.py::CalculatorTest::test_multiply PASSED [ 66%]
tst/main.py::CalculatorTest::test_power PASSED [ 83%]
tst/main.py::CalculatorTest::test_subtract PASSED [100%]
================================== 6 passed in 0.01 seconds ==================================
Testing Frameworks
https://wiki.python.org/moin/PythonTestingToolsTaxonomy
import unittest
class TestStringMethods(unittest.TestCase):
def test_upper(self):
self.assertEqual('foo'.upper(), 'FOO')
def test_isupper(self):
self.assertTrue('FOO'.isupper())
self.assertFalse('Foo'.isupper())
def test_split(self):
s = 'hello world'
self.assertEqual(s.split(), ['hello', 'world'])
with self.assertRaises(TypeError):
s.split(2)
if __name__ == '__main__':
unittest.main()# content of test_sample.py
def inc(x):
return x + 1
def test_answer():
assert inc(3) == 5$ pytest
def test_numbers_3_4():
assert multiply(3,4) == 12
def test_strings_a_3():
assert multiply('a',3) == 'aaaclass MangoUseCase(TestCase):
def setUp(self):
self.user = 'placeholder'
@mango.given('I am logged-in')
def test_profile(self):
self.given.profile = 'profile'
self.given.photo = 'photo'
self.given.notifications = 3
self.given.notifications_unread = 1
@mango.when('I click profile')
def when_click_profile():
print('click')
@mango.then('I see profile')
def then_profile():
self.assertEqual(self.given.profile, 'profile')
@mango.then('I see my photo')
def then_photo():
self.assertEqual(self.given.photo, 'photo')from radish import given, when, then
@given("I have the numbers {number1:g} and {number2:g}")
def have_numbers(step, number1, number2):
step.context.number1 = number1
step.context.number2 = number2
@when("I sum them")
def sum_numbers(step):
step.context.result = step.context.number1 + \
step.context.number2
@then("I expect the result to be {result:g}")
def expect_result(step, result):
assert step.context.result == result"""
The example module supplies one function, factorial(). For example,
>>> factorial(5)
120
"""
def factorial(n):
"""Return the factorial of n, an exact integer >= 0.
>>> [factorial(n) for n in range(6)]
[1, 1, 2, 6, 24, 120]
>>> factorial(30)
265252859812191058636308480000000
>>> factorial(-1)
Traceback (most recent call last):
...
ValueError: n must be >= 0
Factorials of floats are OK, but the float must be an exact integer:
>>> factorial(30.1)
Traceback (most recent call last):
...
ValueError: n must be exact integer
>>> factorial(30.0)
265252859812191058636308480000000
It must also not be ridiculously large:
>>> factorial(1e100)
Traceback (most recent call last):
...
OverflowError: n too large
"""
import math
if not n >= 0:
raise ValueError("n must be >= 0")
if math.floor(n) != n:
raise ValueError("n must be exact integer")
if n+1 == n: # catch a value like 1e300
raise OverflowError("n too large")
result = 1
factor = 2
while factor <= n:
result *= factor
factor += 1
return result
if __name__ == "__main__":
import doctest
doctest.testmod()Sample Session with Test Frameworks
$ py.test -v
========================================================= test session starts ==========================================================
platform darwin -- Python 3.7.3, pytest-4.3.1, py-1.8.0, pluggy-0.9.0 -- /CLOUD/Development.Anaconda/anaconda3/bin/python
cachedir: .pytest_cache
rootdir: /CLOUD/Development.Python/Repositories.FromGithub/repositories/python-toolbox/Working-with-TDD/app, inifile:
plugins: remotedata-0.3.1, openfiles-0.3.2, doctestplus-0.3.0, arraydiff-0.3
collected 4 items
test_base.py::test_should_pass PASSED [ 25%]
test_base.py::test_should_raise_error PASSED [ 50%]
test_base.py::test_check_if_true_is_true PASSED [ 75%]
test_base.py::test_check_if_inc_works PASSED
$ nosetests -v
test_base.test_should_pass ... ok
test_base.test_should_raise_error ... ok
test_base.test_check_if_true_is_true ... ok
test_base.test_check_if_inc_works ... ok
----------------------------------------------------------------------
Ran 4 tests in 0.001s
OK
Links and additional information
http://pythontesting.net/
https://www.xenonstack.com/blog/test-driven-development-big-data/
https://realpython.com/python-testing/