I just want to learn and work with a new technology, so I bought a 3D printer based on an Arduino Mega 2560. (More on this in the following Blog entry)
To be prepared with the Arduino, I want to play with it. So I started with a starter kit and a sensor kit from elegoo.com
Set / Kit for Arduino MEGA2560 Most complete Ultimate Starter Kit with German tutorial, MEGA2560 R3 Microcontroller and many additional for the Arduino Mega2560 R3
Upgraded 37 in 1 Sensor Modules Kit With English tutorial for the Arduino UNO R3 MEGA 2560 Nano
First Steps
Setup and illuminate the lab
Start with a simple project
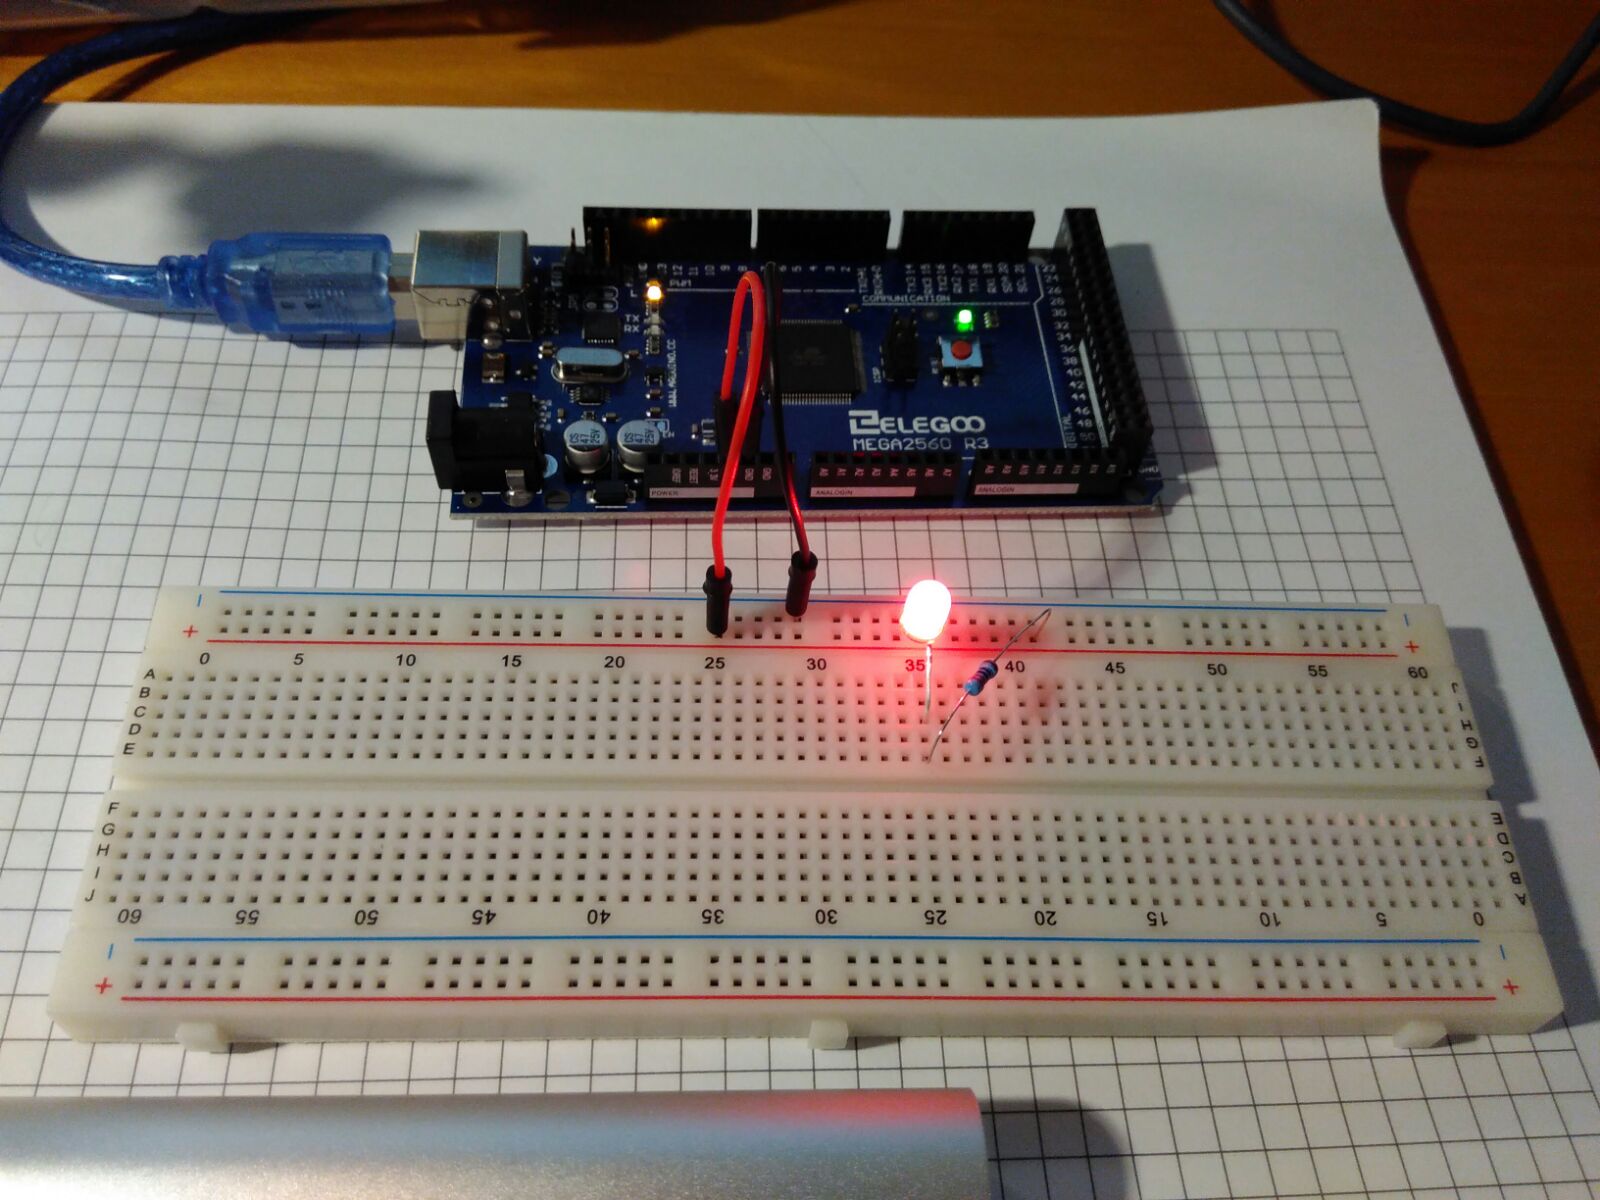
After installing and setting up everything, I started with my first small project: Measure the distance with a sonic sensor and display it through an LCD panel:
1 x MEGA2560 R3 Mikrocontroller 1 x MB-102 Versuchsaufbau 1 x Prototyp-Erweiterungsplatine 1 x LCD1602 Anzeige(mit Pin Header) 1 x DHT11 Modul 1 x Joystick-Modul 1 x 5V Relais 1 x Schallsensor-Modul 1 x DS3231 Echtzeituhren-Modul 1 x Drehgeber modul 1 x Membranschalter-Modul 1 x Versuchsaufbau 1 x HC-SR501 PIR-Modul 1 x ADXL335 Modul 1 x MAX7219 Modul 1 x Wasserfüllstanderkennung-Sensormodul 1 x RC522 RFID-Modul 1 x Servomechanismus (SG90) 1 x Schrittmotor 1 x ULN2003 Schrittmotor-Treibermodul 1 x Power Supply Module 1 x Ultraschall-Sensor-Modul 1 x IR-Empfängermodul 1 x IR-Fernbedienung 1 x 3V Gleichstrommotor 1 x USB Kabel 1 x 65 M-M Kabel 1 x 10 Female-to-Male Kabel 1 x 9 V Akku mit DC 1 x 9 V 1 A Netzteil 1 x Kugelschalter 1 x Segmentanzeige 1 x 4-stellige 7-Segmentanzeige 1 x IC L293D 1 x IC 74HC595 1 x Aktiver Summer 1 x Passiver Summer 2 x Potentiometer 1 x Thermistoren 5 x Diode Rectifier (1N4007) 5 x NPN Transistor (pn2222) 5 x NPN Transistor (S8050) 2 x Fotozelle 5 x 22pF Keramikkondensator 5 x 10⁴pF Keramikkondensator 2 x Elektrolytkondensator (10uF 50 V) 2 x elektrolytischen Kondensator (100uF 50 V) 1 x RGB LED 5 LEDs, jeweils in weiß, gelb, blau, grün, rot 5 x Druckschalter 10 Widerstände (Ohm): 10, 100, 220, 330, 1k, 2k, 5k1, 10k, 100k, 1m
Upgraded 37 in 1 Sensor Modules Kit
1 x JoystickModule 1 x RelayModule 1 x Rotary EncoderModule 1 x DS-3231 RTC Module 1 x Ultrasonic SensorModule 1 x HC-SR501 PIR sensor Module 1 x Flame SensorModule 1 x Linear HallModule 1 x Metal TouchModule 1 x Digital TemperatureModule 1 x Big SoundModule 1 x Small SoundModule 1 x RGB LEDModule 1 x SMD RGBModule 1 x Two-tone ColorModule 1 x 7 Color FlashModule 1 x Laser EmitModule 1 x ShockModule 1 x IR ReceiverModule 1 x IR EmissionModule 1 x Tilt SwitchModule 1 x ButtonModule 1 x Active BuzzerModule 1 x Passive BuzzerModule 1 x 18B20 tempModule 1 x Photo-resistorModule 1 x Temperature and HumidityModule 1 x GY-521 Module 1 x Photo-interrupterModule 1 x Tap ModuleModule 1 x Membrane SwitchModule 1 x AvoidanceModule 1 x TrackingModule 1 x Magnetic SpringModule 1 x Water Lever Sensor 1 x Power Supply Module 1 x LCD1602 Module (with pin header)
An important dependency before Homebrew can work is the Command Line Tools for Xcode. These include compilers that will allow you to build things from source.
To install a package (or Formula in Homebrew vocabulary) simply type:
brew install <formula>
Update
To update Homebrew’s directory of formula, run:
brew update
To see if any of your packages need to be updated:
brew outdated
To update a package:
brew upgrade <formula>
Homebrew keeps older versions of packages installed, in case you want to roll back. That rarely is necessary, so you can do some cleanup to get rid of those old versions:
brew cleanup
To see what you have installed (with their version numbers):
brew list --versions
Homebrew Cask
Let’s see if we can get the elegance, simplicity, and speed of Homebrew for the installation and management of GUI Mac applications such as Google Chrome and Adium.
brew cask install google-chrome
Configure brew on macOS
If you want to use tools such as ruby or gem, you can configure brew to use this tools without the need of superuser permissions: Use environment variable:
root@a5b411d609f0:/# uname -a
Linux a5b411d609f0 4.4.27-moby #1 SMP Wed Oct 26 14:21:29 UTC 2016 x86_64 x86_64 x86_64 GNU/Linux
root@a5b411d609f0:/# id
uid=0(root) gid=0(root) groups=0(root)
root@a5b411d609f0:/# hostname
a5b411d609f0
root@a5b411d609f0:/#
Leave image
root@a5b411d609f0:/# exit
exit
$
Show running images
$ docker ps -a
CONTAINER ID  IMAGE   COMMAND      CREATED        STATUS                   PORTS  NAMES
b01ba9bfef78  ubuntu  "/bin/bash"  41 seconds ago Exited (0) 2 seconds ago        ubuntu
Start image
$ docker start ubuntu
ubuntu
$ docker ps -a
CONTAINER ID  IMAGE   COMMAND      CREATED        STATUS                 PORTS   NAMES
b01ba9bfef78  ubuntu  "/bin/bash"  2 minutes ago  Up 1 seconds                   ubuntu
Attach to image, e.g. “enter” the image
Don’t forget to press enter after you entered the command do display the shell in the image again
$ docker attach ubuntu
root@b01ba9bfef78:/#
Working with Docker
$ docker run -it --name ubuntu ubuntu bash
You are in a terminal with ubuntu and can do whatever you like.
$ docker-machine create --driver=virtualbox default
$ docker-machine ls
NAME         ACTIVE   DRIVER       STATE     URL                         SWARM   DOCKER    ERRORS
default      -        virtualbox   Running   tcp://192.168.99.100:2376           v1.12.2
virtualbox   -        virtualbox   Stopped                                       Unknown
Show environment of machine
$ docker-machine env
export DOCKER_TLS_VERIFY="1"
export DOCKER_HOST="tcp://192.168.99.100:2376"
export DOCKER_CERT_PATH="/Users/docker/.docker/machine/machines/default"
export DOCKER_MACHINE_NAME="default"
# Run this command to configure your shell:
# eval $(docker-machine env)
Stop machine
$ docker-machine stop default
Stopping "default"...
docker-Machine "default" was stopped.
Start machine
$ docker-machine start default
Starting "default"...
(default) Check network to re-create if needed...
(default) Waiting for an IP...
Machine "default" was started.
Waiting for SSH to be available...
Detecting the provisioner...
Started machines may have new IP addresses. You may need to re-run the docker-machine env command.
Edit the Vagrantfile in this directory and replace
config.vm.box = "precise32"
Start Vagrant box
$ vagrant up
Connect using SSH
$ vagrant ssh
Stop working with Vagrant
$ vagrant halt
Destroy the machine
$ vagrant destroy
We use cookies on our website to give you the most relevant experience by remembering your preferences and repeat visits. By clicking “Accept All”, you consent to the use of ALL the cookies. However, you may visit "Cookie Settings" to provide a controlled consent.
This website uses cookies to improve your experience while you navigate through the website. Out of these, the cookies that are categorized as necessary are stored on your browser as they are essential for the working of basic functionalities of the website. We also use third-party cookies that help us analyze and understand how you use this website. These cookies will be stored in your browser only with your consent. You also have the option to opt-out of these cookies. But opting out of some of these cookies may affect your browsing experience.
Necessary cookies are absolutely essential for the website to function properly. These cookies ensure basic functionalities and security features of the website, anonymously.
Cookie
Duration
Description
cookielawinfo-checkbox-analytics
11 months
This cookie is set by GDPR Cookie Consent plugin. The cookie is used to store the user consent for the cookies in the category "Analytics".
cookielawinfo-checkbox-functional
11 months
The cookie is set by GDPR cookie consent to record the user consent for the cookies in the category "Functional".
cookielawinfo-checkbox-necessary
11 months
This cookie is set by GDPR Cookie Consent plugin. The cookies is used to store the user consent for the cookies in the category "Necessary".
cookielawinfo-checkbox-others
11 months
This cookie is set by GDPR Cookie Consent plugin. The cookie is used to store the user consent for the cookies in the category "Other.
cookielawinfo-checkbox-performance
11 months
This cookie is set by GDPR Cookie Consent plugin. The cookie is used to store the user consent for the cookies in the category "Performance".
viewed_cookie_policy
11 months
The cookie is set by the GDPR Cookie Consent plugin and is used to store whether or not user has consented to the use of cookies. It does not store any personal data.
Functional cookies help to perform certain functionalities like sharing the content of the website on social media platforms, collect feedbacks, and other third-party features.
Performance cookies are used to understand and analyze the key performance indexes of the website which helps in delivering a better user experience for the visitors.
Analytical cookies are used to understand how visitors interact with the website. These cookies help provide information on metrics the number of visitors, bounce rate, traffic source, etc.
Advertisement cookies are used to provide visitors with relevant ads and marketing campaigns. These cookies track visitors across websites and collect information to provide customized ads.